
# 邮件发送
发送邮件需要一个邮件服务器,通常来说搭建一个邮件服务器是完全没有必要的,我们可以使用163、谷歌、QQ邮箱等,公司可以使用企业邮箱,这类的服务也比较多,本章我将带大家使用 163邮箱进行发送邮件。
# 邮箱授权
要发送邮件,我们需要有自己的邮箱,还要获取到授权码,那怎么获取到授权码呢? 如下图以 163 为例:

# 安装插件
Nodemailer 是Node.js 应用程序的模块,可以轻松发送电子邮件。该项目始于2010年,当时没有理智的选项来发送电子邮件,如今,它已成为大多数Node.js用户默认使用的解决方案。
$ npm install nodemailer --save
# 配置参数
config/config.default.ts:
config.mail = {
    host: 'smtp.163.com',  // SMTP服务
    port: 465,
    auth: {
      user: 'xxxxxxxx',	// 账号
      pass: 'xxxxxxxx',	// 授权码
    },
};
# 编写逻辑
在完成上述步骤后,接下来我们来编写发送邮件的逻辑。
# 定义接口
首先我们需要定义一个接口,这个接口中包括了我们发送邮件所需的参数以及类型。
interface IMailData {
  to: string;  // 接收者
  subject: string;	// 标题
  html: string;	// 内容
}
# 编写 service
https://github.com/push-over/egg-example/blob/c72d08141f/app/service/Utils.ts
nodemailer (opens new window) 这个插件非常方便,我们只需要提供一些参数就可以完成邮件发送:
import * as nodemailer from 'nodemailer';

export default class Utils extends Service {
	public async sendMail(data: IMailData) {
        // 所需的参数
        const { to, subject, html } = data;
        // 我们之前配置的参数
        const { host, port, auth } = this.app.config.mail;
        // 创建传输器对象
        const transporter = nodemailer.createTransport({ host, port, auth });
        try {
          // 使用定义的传输对象发送邮件
          return await transporter.sendMail({
            from: auth.user, // 发件人地址
            to, // 接收者名单
            subject, // 主题
            html, // html 正文
          });
        } catch (error) {
          throw error;
        }
  }
}
# 编写服务
一切准备就绪,接下来让我们来实现发送短信。
# 定义类型
https://github.com/push-over/egg-example/blob/c72d08141f/app/graphql/utils/schema.graphql
定义参数数据类型:
input Mail {
  # 接收者
  to: String!
  # 标题
  subject: String!
  # 内容
  html: String!
}
# 调用方法发送邮件
https://github.com/push-over/egg-example/blob/c72d08141f/app/graphql/utils/connector.ts
在这里我们只需要调用我们发送邮件的方法即可:
public async sendMail(data: IMailData) {
    const { ctx } = this;
    return await ctx.service.utils.sendMail(data);
  }
# 数据操作
https://github.com/push-over/egg-example/blob/c72d08141f/app/graphql/utils/resolver.ts
接下来我们来进行数据操作,完成发送邮件的服务:
Mutation: {
    async sendMail(_root: any, { data }, { connector }) {
      const mail = await connector.utils.sendMail(data);
      return mail.response;  // 成功消息
    }
}

type Mutation {
  sendMail(data: Mail!) : String!
}
# 测试
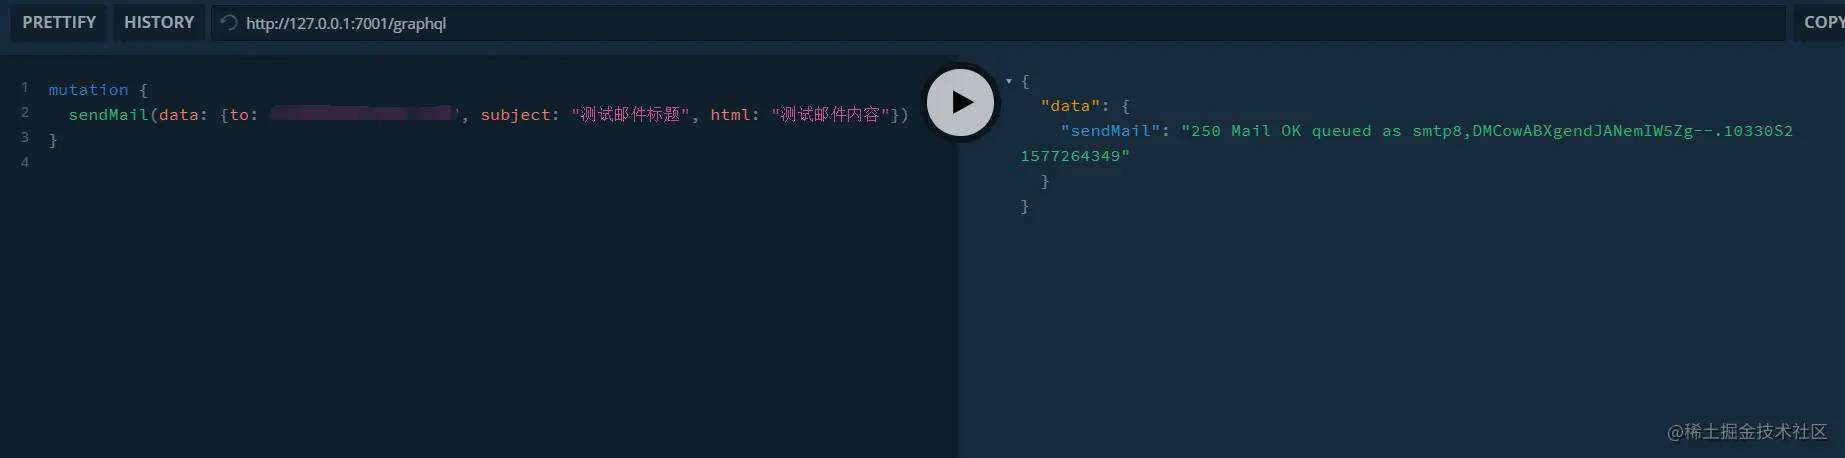
我们使用开发者工具来测试一下,能不能正常发送短信:
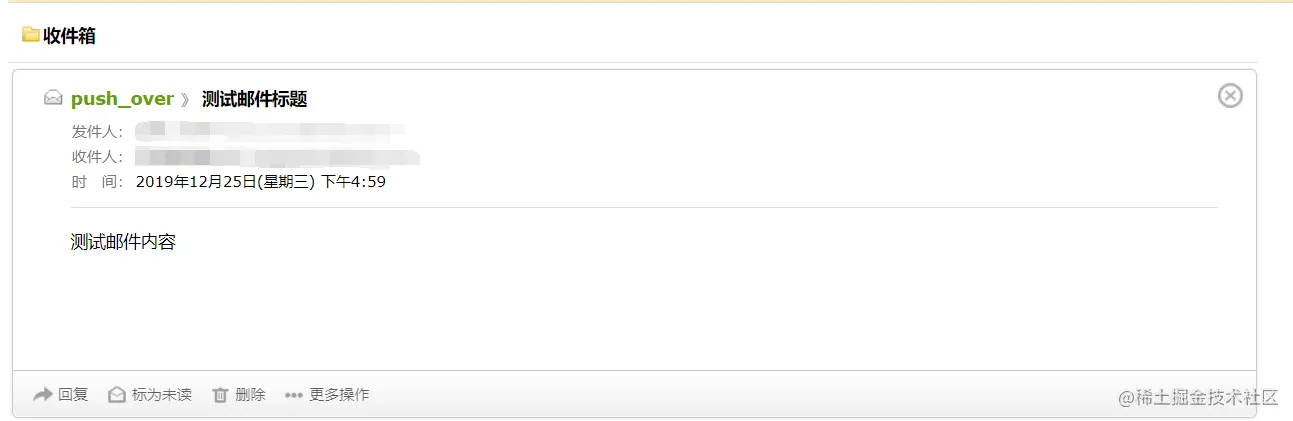
我们来查看下邮箱,看看有没有收到邮件:
# 小结
在这篇里带大家完成了怎么集成邮件服务并发送短信,大家可以想一想可不可以在我们之前注册时,短信验证码的基础上再增加邮件验证。或者你还有什么别的奇思妙想,都可以动起手了哦。


