最近抽空将播放器的界面做了一些更新,如图所示:

一共分两路更新:
- CD 界面重构
- 增加倍速播放,歌词解析插件升级
# CD 界面重构
进入到 normal-player/index.js 中,将 CDWrapper 中的内容换成如下所示的代码:
// 可旋转 needle
<div className={`needle ${playing? '' : 'pause'}`}></div>
<div className="cd">
  <img
    className={`image play ${playing? '' : 'pause'}`}
    src={song.al.picUrl + "?param=400x400"}
    alt=""
  />
</div>
<p className="playing_lyric">{currentPlayingLyric}</p>
在 style.js 中:
import disc from './disc.png';
import needle from './needle.png';

export const CDWrapper = styled.div`
  margin: auto;
  position: absolute;
  width: 100%;
  top: 0;
  bottom: 0;
  display: flex;
  justify-content: center;
  box-sizing: border-box;
  .needle {
    position: absolute;
    top: -6.67vw;
    left: 48vw;
    width: 25vw;
    height: 40vw;
    z-index: 100;
    background-image: url (${needle});
    ${style.bgFull ()};
    transform-origin: 4.5vw 4.5vw;
    transition: all 0.3s;
    transform: rotate (0);
    &.pause {
      transform: rotate (-30deg);
    }
  }
  .cd {
    top: 16%;
    position: absolute;
    width: 70%;
    height: 70vw;
    background-image: url (${disc});
    border: 4px solid ${style ["border-color-v2"]};
    border-radius: 50%;
    ${style.bgFull ()};
    .image {
      position: absolute;
      left: 0;right: 0;
      top: 0;bottom: 0;
      width: 68%;
      height: 68%;
      margin: auto;
      border-radius: 50%;
    }
    .play {
      animation: ${rotate} 20s linear infinite;
      &.pause {
        animation-play-state: paused;
      }
    }
  }
  .playing_lyric {
    position: absolute;
    margin: auto;
    width: 80%;
    top: 95vw;
    font-size: 14px;
    line-height: 20px;
    white-space: normal;
    text-align: center;
    color: rgba (255, 255, 255, 0.5);
  }
`;
needle 和 disc 图片大家可以进入这个链接获取: 点击获取 (opens new window)
另外,global-style.js 中的内容也有所更新:
const bgFull = () => {
  return `
    background-position: 50%;
    background-size: contain;
    background-repeat: no-repeat;
  `
};

export default {
  //...
  "border-color-v2": "rgba (228, 228, 228, 0.1)",
  bgFull
};
另一部分是 Top 部分的更新。
// JSX
<Top className="top">
<div className="back" onClick={() => toggleFullScreenDispatch (false)}>
<i className="iconfont icon-back"></i>
</div>
<div className="text">
<h1 className="title">{song.name}</h1>
<h1 className="subtitle">{getName (song.ar)}</h1>
</div>
</Top>
//style.js
export const Top = styled.div`
box-sizing: border-box;
position: absolute;
display: flex;
align-items: center;
margin-bottom: 15px;
border-bottom: 1px solid ${style ["border-color-v2"]};
padding-bottom: 5px;
width: 100%;
height: 8%;
.back {
margin-left: 5px;
z-index: 50;
.iconfont {
display: block;
padding: 9px;
font-size: 24px;
color: ${style ["font-color-desc"]};
font-weight: bold;
transform: rotate (90deg);
}
}
.text {
flex: 1;
display: flex;
flex-direction: column;
margin-top: 10px;
}
.title {
line-height: 25px;
font-size: ${style ["font-size-l"]};
color: ${style ["font-color-desc"]};
${style.noWrap ()};
}
.subtitle {
line-height: 20px;
font-size: ${style ["font-size-m"]};
color: ${style ["font-color-desc-v2"]};
${style.noWrap ()};
}
`;
现在,就能看到文章开始的那个效果啦!
# 倍速播放功能添加
首先需要作好数据层的准备。因为目前来说我们希望歌曲播放的速度是一个全局性的变量,即使更换了歌曲依然按照速度不会变。因此特意把它放到了 redux 中存储。
//constants.js
export const CHANGE_SPEED = 'player/CHANGE_SPEED';

//reducer.js
const defaultState = fromJS ({
  //...
  speed: 1
});
export default (state = defaultState, action) => {
  switch (action.type) {
    //...
    case actionTypes.CHANGE_SPEED:
      return state.set ('speed', action.data);
    default:
      return state;
  }
}

//actionCreators.js
export const changeSpeed = (data) => ({
  type: CHANGE_SPEED,
  data
});
还有对于播放速度的配置数据:
//api/config.js
// 倍速播放配置
export const list = [
  {
    key: 0.75,
    name: "x0.75"
  },
  {
    key: 1,
    name:"x1"
  },
  {
    key: 1.25,
    name:"x1.25"
  },
  {
    key: 1.5,
    name:"x1.5"
  },
  {
    key: 2,
    name:"x2"
  }
]
OK, 现在我们来对接 Player 组件。
import { changeSpeed } from './store/actionCreators';
import { list } from "../../../api/config";

// 组件内
const { speed } = props;
const { changeSpeedDispatch } = props;
// 映射 Redux 全局的 state 到组件的 props 上
const mapStateToProps = state => ({
  //...
  speed: state.getIn (["player", "speed"]),
});

// 映射 dispatch 到 props 上
const mapDispatchToProps = dispatch => {
  return {
    //...
    changeSpeedDispatch (data) {
      dispatch (changeSpeed (data));
    }
  };
}
在 normalPlayer 中的 Bottom 部分我们往首部加入:
<List>
  <span > 倍速听歌 </span>
  {
    list.map ((item) => {
      return (
        <ListItem
          key={item.key}
          className={`${speed === item.key ? 'selected': ''}`} >
            {item.name}
        </ListItem>
      )
    })
  }
</List>
其中 List, ListItem 在 style.js 中导出:
export const List = styled.div`
  width: 70%;
  margin: auto;
  display: flex;
  align-items: center;
  height: 30px;
  justify-content: space-around;
  overflow: hidden;
  >span:first-of-type {
    display: block;
    flex: 0 0 auto;
    padding: 5px 0;
    color: ${style ["font-color-desc-v2"]};
    font-size: ${style ["font-size-m"]};
    vertical-align: middle;
  }
`
export const ListItem = styled.span`
  flex: 0 0 auto;
  font-size: ${style ["font-size-m"]};
  padding: 5px 5px;
  border-radius: 10px;
  color: ${style ["font-color-desc-v2"]};
  &.selected {
    color: ${style ["theme-color"]};
    border: 1px solid ${style ["theme-color"]};
    opacity: 0.8;
  }
`
然后引入:
import { List, ListItem } from './style';
现在我们来给每一个 ListItem 绑定点击事件。
const { clickSpeed } = props;
//JSX
<ListItem
  //...
  onClick={() => clickSpeed (item.key)}>
    {item.name}
</ListItem>
这个处理逻辑由父组件传递,我们在父组件来编写具体的逻辑。
useEffect (() => {
  //...
  audioRef.current.src = getSongUrl (current.id);
  audioRef.current.autoplay = true;
  // 这里加上对播放速度的控制
  audioRef.current.playbackRate = speed;
  //...
}, [currentIndex, playList]);
const clickSpeed = (newSpeed) => {
  changeSpeedDispatch (newSpeed);
  //playbackRate 为歌词播放的速度,可修改
  audioRef.current.playbackRate = newSpeed;
  // 别忘了同步歌词
  currentLyric.current.changeSpeed (newSpeed);
  currentLyric.current.seek (currentTime*1000);
}
好,现在歌曲可以正常播放了。但是同时还有一个非常严重的问题,那就是歌词不能倍速播放,也就是歌曲和歌词不同步!
看似是一个难以解决的问题,但是我们只需要稍稍对歌词插件做一些扩展即可:
//api/lyric-parser.js
export default class Lyric {
  constructor (lrc, handler, speed) {
    //...
    this.speed = speed || 1;

    this._init ();
  }
  changeSpeed (speed) {
    this.speed = speed;
  }
}
然后是一个最关键的修改:
_playRest (isSeek=false) {
  //...
  this.timer = setTimeout (() => {
    this._callHandler (this.curLineIndex++)
    if (this.curLineIndex < this.lines.length && this.state === STATE_PLAYING) {
      this._playRest ()
    }
    // 注意定时器的时间
  }, (delay /this.speed))
}
当速度变为 x2 的时候,其实离下一句歌词到来的时间间隔变为了原来的 1 / 2。依此类推。
这样歌词能够正常倍速播放了。
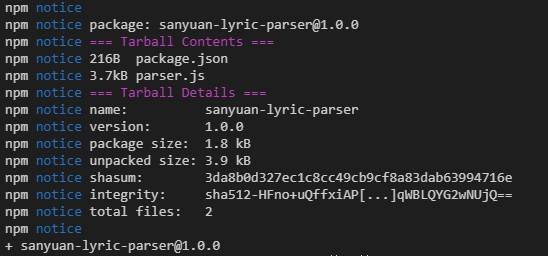
现在的歌词插件可以说是一个相对完整的插件了,我们也可以将它发布到 npm 上作为第三方包供其他开发者使用。做法也非常简单:
- 在 www.npmjs.com 网站上注册一个用户
- 通过 npm init 创建一个仓库
- 通过 npm adduser 登录你的 npm 账户
- 使用 npm publish 发布你的代码。(上传后第三方包的名字就是 package.json 中的 name 值)
结果如图所示:
阅读全文


