# 一、webpack的dll功能
基于
webpack3构建
# 1.1 dll介绍
我们构建前端项目的时候,往往希望第三方库(
vendors)和自己写的代码可以分开打包,因为第三方库往往不需要经常打包更新。对此Webpack的文档建议用CommonsChunkPlugin来单独打包第三方库
- 我们这里的
dll.js是提前打包好了的,而不是在每次build的时候去打包输出的;这样才能做到依赖包一次构建,无限次使用 webpack输出的文件名都带有hash值; 而用dll构建后输出的文件名是固定的
entry: {
  vendor: ["jquery", "other-lib"],
  app: "./entry"
}
new CommonsChunkPlugin({
  name: "vendor",

  // filename: "vendor.js"
  // (Give the chunk a different name)

  minChunks: Infinity,
  // (with more entries, this ensures that no other module
  //  goes into the vendor chunk)
})
通常为了对抗缓存,我们会给售出文件的文件名中加入
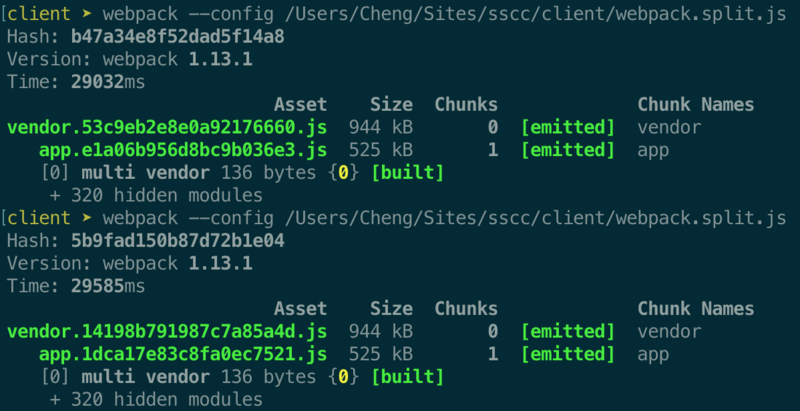
hash的后缀——但是——我们编辑了app部分的代码后,重新打包,发现vendor的hash也变化了

这么一来,意味着每次发布版本的时候,vendor代码都要刷新,即使我并没有修改其中的代码。这样并不符合我们分开打包的初衷
Dll是Webpack最近新加的功能Dll这个概念应该是借鉴了Windows系统的dll。一个dll包,就是一个纯纯的依赖库,它本身不能运行,是用来给你的app引用的- 打包
dll的时候,Webpack会将所有包含的库做一个索引,写在一个manifest文件中,而引用dll的代码(dll user)在打包的时候,只需要读取这个manifest文件,就可以了。
优势
Dll打包以后是独立存在的,只要其包含的库没有增减、升级,hash也不会变化,因此线上的dll代码不需要随着版本发布频繁更新App部分代码修改后,只需要编译app部分的代码,dll部分,只要包含的库没有增减、升级,就不需要重新打包。这样也大大提高了每次编译的速度- 假设你有多个项目,使用了相同的一些依赖库,它们就可以共用一个
dll
# 1.2 dll使用
首先要先建立一个
dll的配置文件,entry只包含第三方库
第一步:新建webpack.dll.conf.js
webpack.DllPlugin的选项中,path是manifest文件的输出路径;name是dll暴露的对象名,要跟output.library保持一致
// build/webpack.dll.conf.js

const path = require('path')
const webpack = require('webpack')

module.exports = {
  entry: {
    // 把这些资源打包成dll,提高编译速度
    react: ['react','react-router-dom','redux','redux-immutable','immutable','react-redux','react-router','redux-logger','redux-thunk','styled-components'],
    ui: ['antd-mobile','antd'],
    others: ['react-icons','axios','clipboard','humps','lodash','md5','moment','normalizr']
  },
  output: {
    path: path.resolve(__dirname, "../dist/static/js"),
    filename: `[name].dll.js`,
    library: '[name]_library'
  },
  plugins: [
 ...Object.keys(['react','ui','others']).map(name => {
      return new webpack.DllReferencePlugin({
        context: '.',
        manifest: require(`../static/${name}.manifest.json`),
      })
    }),
    new webpack.optimize.UglifyJsPlugin()
  ]
}
第二步:加一个命令
// package.json
"scripts": {
  "dll": "webpack --config config/webpack.dll.conf.js"
}
执行
npm run dll
- 运行
Webpack,会输出两个文件一个是打包好的vendor.js,一个就是manifest.json,长这样
{
  "name": "vendor_ac51ba426d4f259b8b18",
  "content": {
    "./node_modules/antd/dist/antd.js": 1,
    "./node_modules/react/react.js": 2,
    "./node_modules/react/lib/React.js": 3,
    "./node_modules/react/node_modules/object-assign/index.js": 4,
    "./node_modules/react/lib/ReactChildren.js": 5,
    "./node_modules/react/lib/PooledClass.js": 6,
    "./node_modules/react/lib/reactProdInvariant.js": 7,
    "./node_modules/fbjs/lib/invariant.js": 8,
    "./node_modules/react/lib/ReactElement.js": 9,

    ............
Webpack将每个库都进行了编号索引,之后的dll user可以读取这个文件,直接用id来引用

第三步: 在plugins中增加配置
// build/webpack.prod.conf.js
module.exports = {
   plugins: [
        new webpack.DllReferencePlugin({
          manifest: require('../dll/react-manifest.json')
        }),
        new webpack.DllReferencePlugin({
          manifest: require('../dll/ui-manifest.json')
        }),
        new webpack.DllReferencePlugin({
          manifest: require('../dll/others-manifest.json')
        })
   ]
}
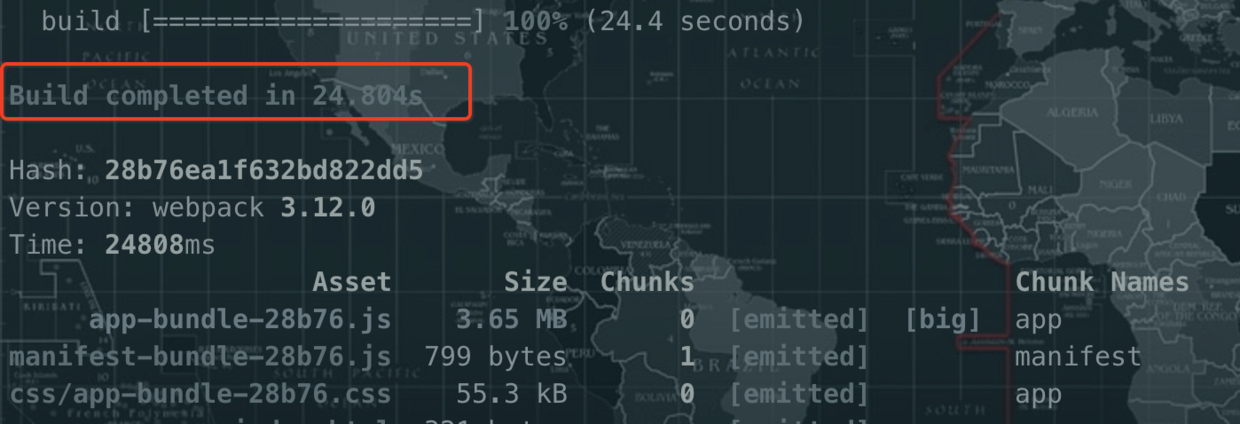
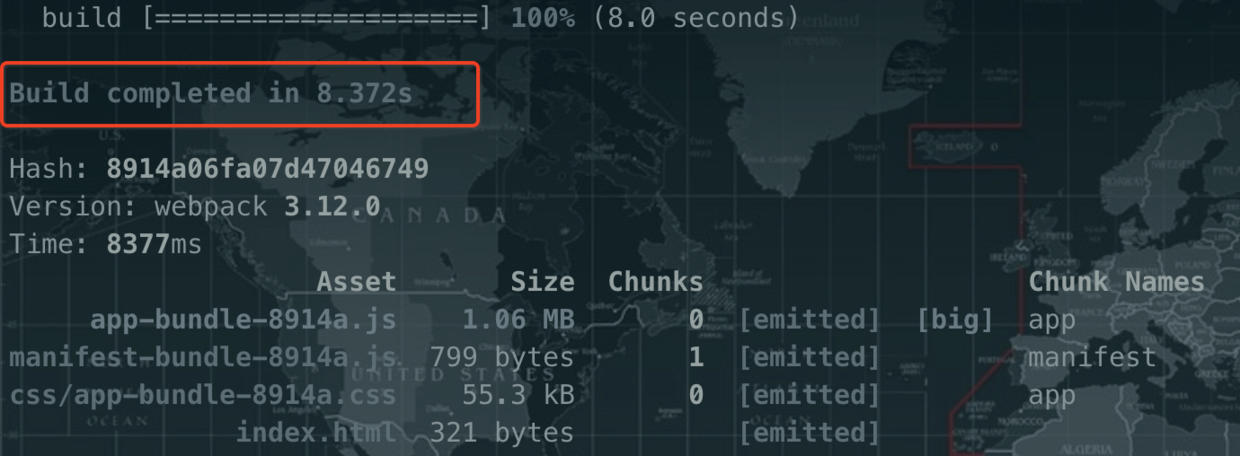
再次执行
npm run build
之前

之后

# 二、happypack 多线程打包
一般情况下,js是单线程执行的,但
node不是。利用node提供的多线程环境,happypack是可以多线程打包的。基本上打开官网看了一下readme就可以配置了,特别是我只针对js的编译进行优化,配置还是比较简单的。
https://www.npmjs.com/package/happypack
happyPack把所有串行的东西并行处理,使得loader并行处理,较少文件处理时间
// build/webpack.prod.conf.js

// @file: webpack.config.js
const HappyPack = require('happypack');

exports.module = {
  rules: [
    {
      test: /.js$/,
      // 1) replace your original list of loaders with "happypack/loader":
      // loaders: [ 'babel-loader?presets[]=es2015' ],
      use: 'happypack/loader',
      include: [ /* ... */ ],
      exclude: [ /* ... */ ]
    }
  ],
  plugins: [
     // 2) create the plugin:
    new HappyPack({
        // 3) re-add the loaders you replaced above in #1:
        loaders: [ 'babel-loader?presets[]=es2015' ]
    })
  ]
}
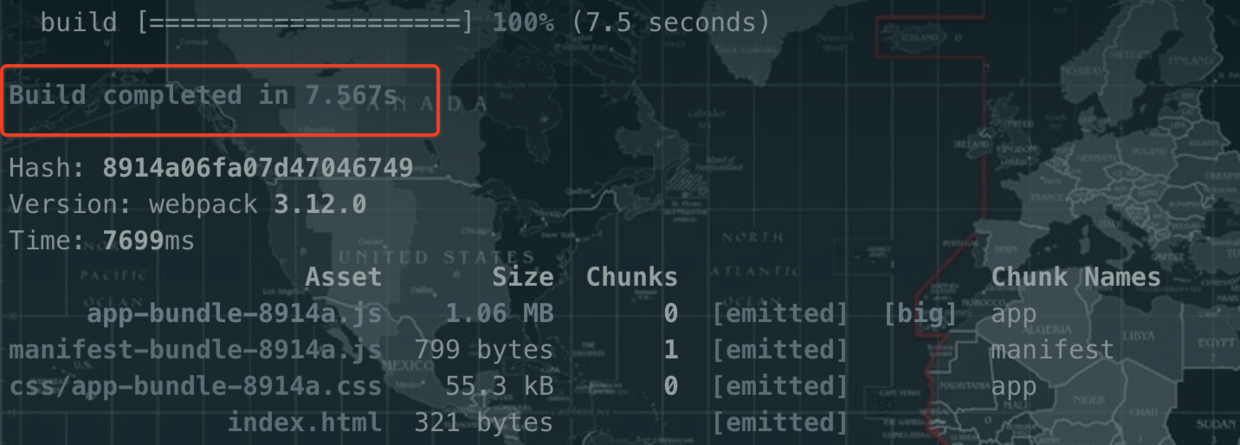
这时的编译时间也减小了一些

更多详情 http://blog.poetries.top/2018/11/21/webpack-review/#6-1-%E5%88%86%E6%9E%90%E6%89%93%E5%8C%85%E7%BB%93%E6%9E%9C
# 三、更多参考
阅读全文