# 为什么要使用hash?
一句话来说就是可以配合浏览器缓存带给更佳的用户体验,根据文件来生成对应的hash值以此来告诉浏览器要不要读区缓存。
# 前期准备
mkdir webpack-hash && cd webpack-hash

npm init

cnpm i webpack webpack-cli webpack-merge clean-webpack-plugin style-loader css-loader mini-css-extract-plugin --save-dev

touch webpack.common.js

mkdir src && cd src

mkdir js && cd js

touch index.js
touch vendors.js

cd ../

mkdir style && cd style

touch style.css
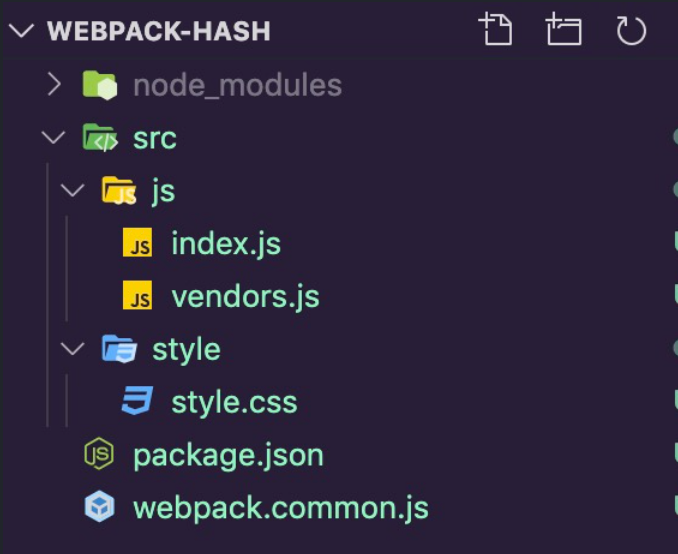
现在整个项目目录变为:
给每个文件里加点东西:
*/src/js/index.js*:
console.log('我是index.js')
/src/js/vendors.js:
console.log('我是vendors.js')
/src/style/style.css:
.container {
  background-color: red;
}
同时配置一个公共的
webpack配置,也就是配置一下webpack.common.js文件,以便我们后面用webpack-merge来管理不同的webpack配置
webpack.common.js:
const path = require('path');
const MiniCssExtractPlugin = require('mini-css-extract-plugin');
const { CleanWebpackPlugin } = require("clean-webpack-plugin");

module.exports = {
  entry: {
    index: ["./src/js/index.js", "./src/style/style.css"],
    vendors: ["./src/js/vendors.js"]
  },
  plugins: [
    new CleanWebpackPlugin(),
  ],
  module: {
    rules: [
      {
        test: /\.css$/,
        use: [MiniCssExtractPlugin.loader, 'css-loader']
      }
    ]
  }
}
说明:
- 这个配置中暂时没有输出,因为在后面的案例中会演示不同的输出结果
clean-webpack-plugin插件用于每次重新构建能清除上一次的dist文件夹mini-css-extract-plugin插件用于css代码分离,这样能够把打包之后的css文件提取到一个单独的文件中
# hash
输出的结果全部使用hash的情况。
现在我在项目的根目录下再创建一个webpack.allhash.js文件用于演示输出的文件名全用hash会有什么样的效果。
webpack.allhash.js:
const path = require('path');
const merge = require('webpack-merge');
const commonConfig = require('./webpack.common');
const MiniCssExtractPlugin = require('mini-css-extract-plugin');

module.exports = merge(commonConfig, {
  output: {
    path: path.resolve(__dirname, 'dist'),
    filename: 'bundle.[name].[hash].js'
  },
  plugins: [
    new MiniCssExtractPlugin({
      filename: 'css/[name].[hash].css'
    })
  ]
})
同时在package.json中添加一条构建指令:
{
  "scripts": {
    "allhash": "webpack --config webpack.all.hash.js"
  }
}
执行指令:npm run allhash,生成的结果:
Hash: 054de6cd811fc10f7697
Version: webpack 4.43.0
Time: 253ms
Built at: 2020-05-05 11:18:10
                                 Asset        Size  Chunks                         Chunk Names
  bundle.index.054de6cd811fc10f7697.js  1010 bytes       0  [emitted] [immutable]  index
bundle.vendors.054de6cd811fc10f7697.js   996 bytes       1  [emitted] [immutable]  vendors
    css/index.054de6cd811fc10f7697.css    40 bytes       0  [emitted] [immutable]  index
会发现hash有以下几个特点:
- 每个文件都具有相同的哈希值,因为它
[hash]是基于我们使用的所有源文件生成的。 - 如果我重新运行该构建而不更改任何内容,则生成的
[hash]将保持不变。 - 如果我仅编辑一个文件,则
[hash]值将发生变化,并且所有生成捆绑的名称中都会包含此新[hash]。
# chunkhash
输出的结果全部使用chunkhash的情况。
现在我在项目的根目录下再创建一个webpack.all.chunkhash.js文件用于演示输出的文件名全用chunkhash会有什么样的效果。
webpack.all.chunkhash.js:
const path = require('path');
const merge = require('webpack-merge');
const commonConfig = require('./webpack.common');
const MiniCssExtractPlugin = require('mini-css-extract-plugin');

module.exports = merge(commonConfig, {
  output: {
    path: path.resolve(__dirname, 'dist'),
    filename: 'bundle.[name].[chunkhash].js'
  },
  plugins: [
    new MiniCssExtractPlugin({
      filename: 'css/[name].[chunkhash].css'
    })
  ]
})
同时在package.json中添加一条构建指令:
{
  "scripts": {
    "allchunkhash": "webpack --config webpack.all.chunkhash.js"
  }
}
执行指令:npm run allchunkhash,生成的结果:
Hash: ee450c191c81ddb98f9d
Version: webpack 4.43.0
Time: 229ms
Built at: 2020-05-05 12:48:10
                                 Asset        Size  Chunks                         Chunk Names
  bundle.index.2f692fa58c6d6c925cc8.js  1010 bytes       0  [emitted] [immutable]  index
bundle.vendors.cc299d3c3f06a5caeb51.js   996 bytes       1  [emitted] [immutable]  vendors
    css/index.2f692fa58c6d6c925cc8.css    40 bytes       0  [emitted] [immutable]  index
会发现有以下几个特点:
index.js和style.css因为是被打包在同一个模块中的(它们在webpack.common.js的entry中配置的都是index下),所以共用一个chunkhash,所以你会看到构建完之后的bundle.index.xxxx.js和css/index.xxxx.css用的都是同一个chunkhash:2f69....。vendors是属于另一个模块,所以有自己单独的chunkhash:cc29...。
而此时,如果我修改一下style.css或者index.js中的内容的话,例如修改一下style.css:
*/src/style/style.css*:
.container {
  background-color: red;
}
+ .color_red {
+  color: red;
+ }
同时再次执行npm run allchunkhash,生成的结果:
Hash: 158cbe0728eb428017a1
Version: webpack 4.43.0
Time: 148ms
Built at: 2020-05-05 12:59:28
                                 Asset        Size  Chunks                         Chunk Names
  bundle.index.6e8056fd16835471b68c.js  1010 bytes       0  [emitted] [immutable]  index
bundle.vendors.cc299d3c3f06a5caeb51.js   996 bytes       1  [emitted] [immutable]  vendors
    css/index.6e8056fd16835471b68c.css    69 bytes       0  [emitted] [immutable]  index
如果你将两次构建的结果做一个对比,你会发现:
- 修改的
style.css会影响bundle.index.xxxx.js和css/index.xxxx.css的chunkhash,因为它们共用的同一个chunkhash,也就是原本的2f69...变为了6e80...。 - 而另一个没有变动的
vendors它的chunkhash则不会发生改变,还是cc29...。
总结:
所以我们可以得出chunkhash的特点:
chunkhash是根据不同的入口进行依赖文件解析,构建对应的chunk(模块),生成对应的hash值。- 在使用上来说:我们可以把一些公共库和程序入口文件区分开来,单独打包构建,接着可以采用
chunkhash方式来生成hash值,那么只要我们不改动公共库的代码,就可以保证其hash值不受影响,这样也能起到缓存的作用。
# contenthash
输出的结果全部使用contenthash的情况。
现在我在项目的根目录下再创建一个webpack.all.contenthash.js文件用于演示输出的文件名全用contenthash会有什么样的效果。
webpack.all.contenthash.js:
const path = require('path');
const merge = require('webpack-merge');
const commonConfig = require('./webpack.common');
const MiniCssExtractPlugin = require('mini-css-extract-plugin');

module.exports = merge(commonConfig, {
  output: {
    path: path.resolve(__dirname, 'dist'),
    filename: 'bundle.[name].[contenthash].js'
  },
  plugins: [
    new MiniCssExtractPlugin({
      filename: 'css/[name].[contenthash].css'
    })
  ]
})
同时在package.json中添加一条构建指令:
{
  "scripts": {
    "allcontenthash": "webpack --config webpack.all.contenthash.js"
  }
}
执行指令:npm run allcontenthash,生成的结果:
Hash: 158cbe0728eb428017a1
Version: webpack 4.43.0
Time: 214ms
Built at: 2020-05-05 13:12:18
                                 Asset        Size  Chunks                         Chunk Names
  bundle.index.2083ec747d9b6cc1c95a.js  1010 bytes       0  [emitted] [immutable]  index
bundle.vendors.3cd5007d9302e9d3e390.js   996 bytes       1  [emitted] [immutable]  vendors
    css/index.073c69fa52ece15898eb.css    69 bytes       0  [emitted] [immutable]  index
会发现有以下几个特点:
- 每个生成的文件的名称都有一个唯一的
hash值,该哈希值是根据该文件的内容计算得出的。
而此时,如果我修改一下style.css或者index.js中的内容的话,例如修改一下style.css:
.container {
  background-color: red;
}
.color_red {
  color: red;
}
+ .color_green {
+  color: green;
+ }
同时再次执行npm run allcontenthash,生成的结果:
Hash: 59c8c4e5fef835f7cf02
Version: webpack 4.43.0
Time: 214ms
Built at: 2020-05-05 13:16:00
                                 Asset        Size  Chunks                         Chunk Names
  bundle.index.2083ec747d9b6cc1c95a.js  1010 bytes       0  [emitted] [immutable]  index
bundle.vendors.3cd5007d9302e9d3e390.js   996 bytes       1  [emitted] [immutable]  vendors
    css/index.83069e2dd593233bff6f.css   102 bytes       0  [emitted] [immutable]  index
如果你将两次构建的结果做一个对比,你会发现:
- 只有
style.css改动的情况下,则仅生成的style.css将具有新的哈希(就算其与index.js是属于同一个chunk(模块)下的,也不会影响到index.js)。
总结:
所以我们可以得出contenthash的特点:
每个生成的文件的名称都有一个唯一的
hash值,该哈希值是根据该文件的内容计算得出的。当要构建的文件内容发生改变时,就会生成新的
hash值,且该文件的改变并不会影响和它同一个模块下的其它文件。
# 三种hash指纹的区别
hash是跟整个项目的构建相关,只要项目里有文件更改,整个项目构建的hash值都会更改,并且全部文件都共用相同的hash值。(粒度整个项目)chunkhash是根据不同的入口进行依赖文件解析,构建对应的chunk(模块),生成对应的hash值。只有被修改的chunk(模块)在重新构建之后才会生成新的hash值,不会影响其它的chunk。(粒度entry的每个入口文件)contenthash是跟每个生成的文件有关,每个文件都有一个唯一的hash值。当要构建的文件内容发生改变时,就会生成新的hash值,且该文件的改变并不会影响和它同一个模块下的其它文件。(粒度每个文件的内容)
← webpack打包结果依赖分析 优化篇 →


